Wednesday, November 3, 2010

Cleaning the glue overflow and sanding the frame

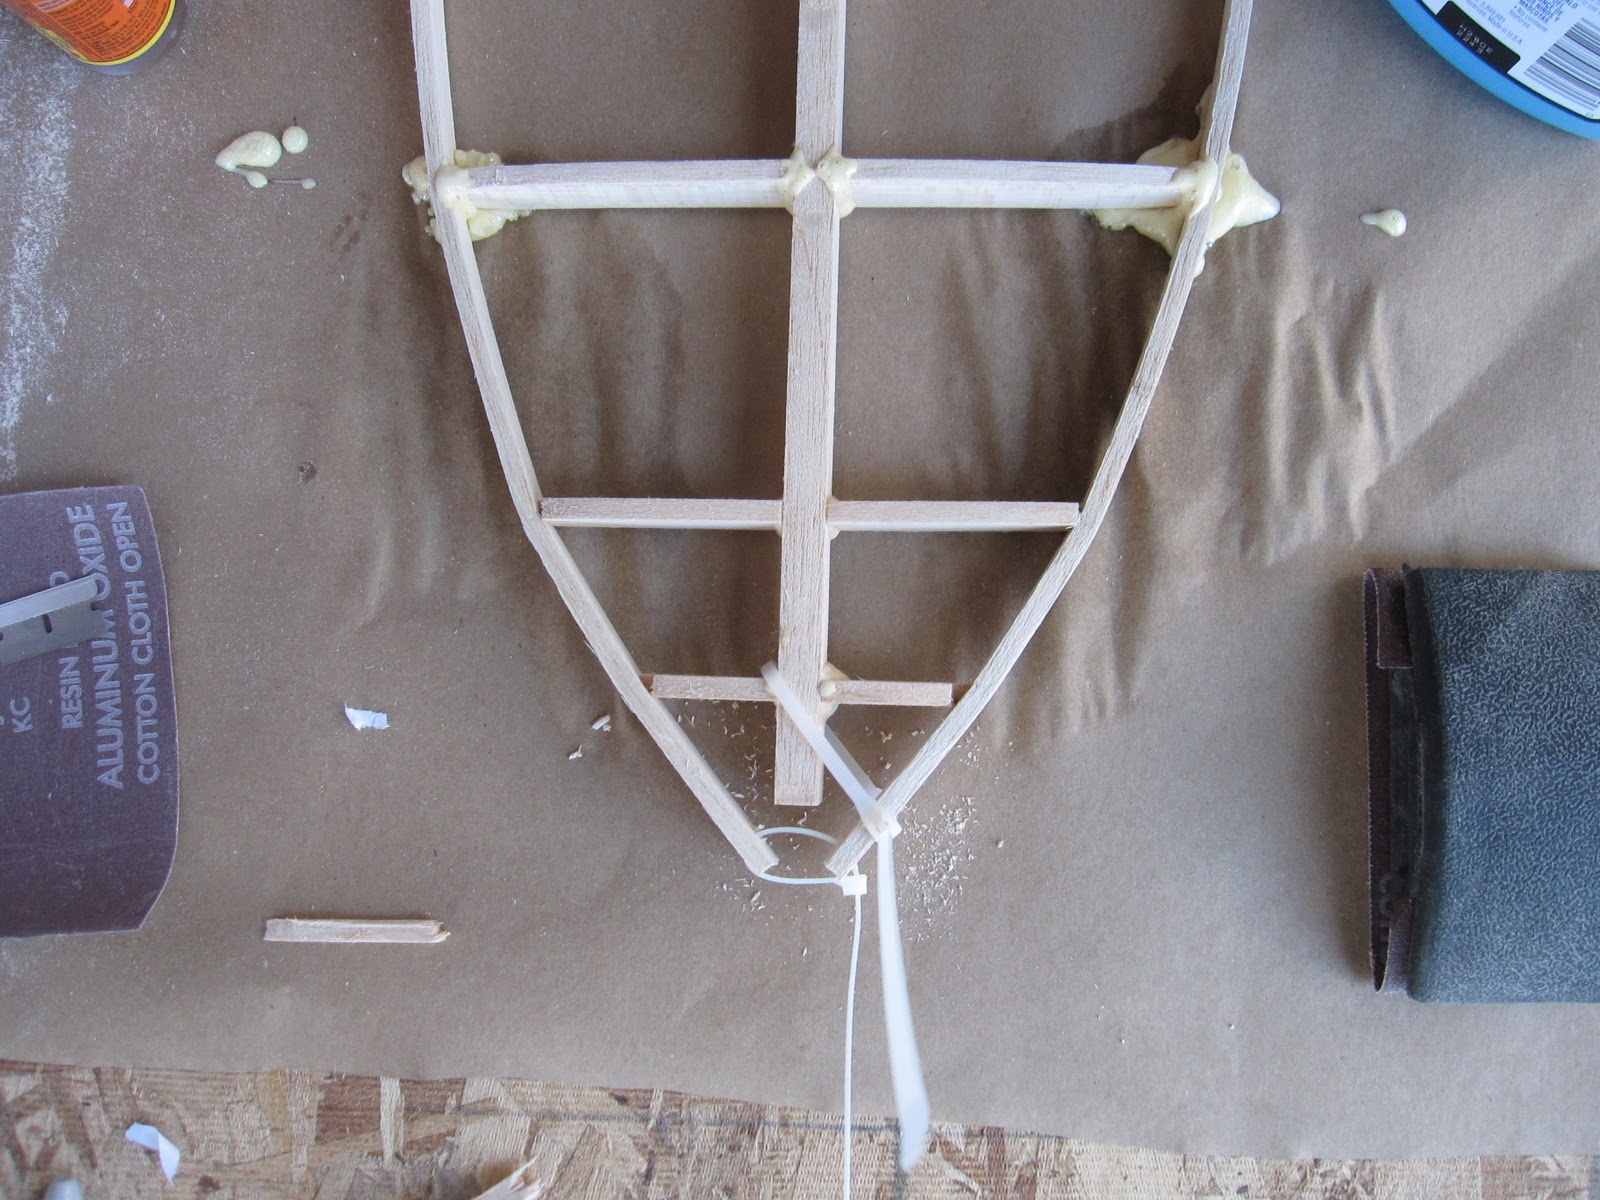
All right at least 24 hours later I have started to sand the frame of the small surfboard to remove the glue foams that build-up because of my sense of glue economy...
I make little hole in the frame for the air to circulate all over the place. I think it is ready to be "skinned". Please click on the ads that you will find within this blog it will help me to alleviate the spending, thank you.


Hehe looking goood!

Here you have the frame of my daughter, it is light enough so she can carry it all over the house playing "the flute like a princess"... Be careful honey, it is still fragile! Ok daddy, but I am a princess! Sure sweety now give your surf back to daddy... pfffuuu! It is still in one piece!


Bending the balsa...

I had fears and concerns on how to bend properly the balsa rail without breaking it. I found over wood working forums that people are using window washer. I was a little beat skeptical but I have tried and it worked perfectly even it was a little to efficient.
I was able to go from that


to this:


I have just sprayed some windex over the supposed bending points and little by little I have tighten those "cops straps". The result was amazing the wood didn't break even a bit.


What a wonderfull father!


Like I have said before, I have ordered way to much wood so I decided to built a surf for my 3 years old daughter. Here you have the skeleton of her surf board, oh cute it is! Her board will be 3ft7 in length, 12 inches wide and 1 and 1/2 inch thick. I know I am a very good father.... To be honest let say that I go each step first on her board and then go for mine.... hehe daddy is training himself!
Posted by Picasa

Sunday, October 24, 2010

Chop chop chop, sand sand sand and sand!

All right I am cutting the balsa pieces! I am using the Dremel Trio, it cuts the wood almost like knife cuts butter. Almost is the big nuance in the sentence… Let say that it is not very difficult to cut but because the Dremel is a rotary tool it make things a little tricky. This rotary movement gives a big willing to the tool to go to some “preset direction”. To make a straight cut you have to fight this willing and find a good angle of progression.


Moreover, because of the density, grain, or whatever this is called changes within the piece of wood, some time I have deviated a bit. I think I didn’t ruin any piece of balsa but I had the feeling of screwing up some part of the job, very unpleasant.

The good thing is I learnt that sanding could smooth everything…when you take the time!
Sanding is going to take a lot of time but it definitely worse it. You can easily see the difference between just cut and cut and sand pieces.


Important piece of advice: please wear a dust masque when cutting and sanding the balsa. The very nasty sawdust goes everywhere and especially in your lungs. I have coughed during half an hour until I finally put this elegant kitchen towel that saves my day! Another thing worse noticing, is the way I glued the paper guide on the wood: I used a (several) glue stick for schools and it worked like a charm. The paper was holding itself up to the time I removed it by just pealing it off. A light sanding with 120 grit on the surface removed any trace of glue.
Please click on the ads that you will find within this blog it will help me to alleviate the spending, thank you. 

Wednesday, October 20, 2010

My stand is done… But…


That’s it! Here’s my super multi-tips surf stand with rocker table. The weather is so awful since few weeks that the work as gone very, very slowly I only have a patio and only half of tit is covered! Well, let say that I am a little disappointed by the San Diego weather, HAAARRRRGGHH!


Never mind I have started to glue the paper shapes on the balsa plank. I’m using a stick of glue with the hope that I will be able to pull the paper off easily when I will be done cutting.


Every thing was going quite well, when all off a sudden it’s going to take a tragic turn! Those guys at Specialized Balsa Wood might have better bought themselves new glasses: I have ordered ½ inch thick planks for the “spine” of my surf, one 36 inches long and an other 48 inches. My plan was to glue them together to have enough of length for the surf. Damned, the longest plank was 2/8 of an inch thicker than the short one wich was at the good thickness. COME ON GUYS!!!!

I only have a Dremel (by the way it’s working really great)! So I have decided to cut the spine anyway and I will try to reduce the thickness of by using the Dremel Trio (this is the one I have) like a router to get ride off those 2/8 of an inch… I think it might be getting hairy but this is my only choice. I don’t want to invest in a 400$ planer just for that and I don’t want to loose my time with the balsa guys… and I want to see if this can work!

Monday, October 11, 2010

The multipurpose surf shaper stand

Here it comes! This is my very first time I will cut a piece of wood with the intention of using it for something else than poking dead animals or throwing it as far as I can....
I am from France and I was raised with the metric system, here, in USA you have this weird measure: inch, foot, yard, 1/2, 1/8, 1/32!! of inch well it is a nightmare for me! It is not that it is hard to go along with but having to approximate the quantity of wood needed I am always waaaayy off! For example, concerning the balsa, I think I will be able to make a second small surfboard for my 3 years old daughter...
Never mind, it is, I guess, better to have a “little” more than being stop because of supply shortage.
So to start with the stand here is what it should look like:


If I have the time, I will make an Ikea like type of plan of all the constructions.
Above the 2 feet of the stand, I will be able to change from the shaper kind of tip to the glassing kind of type tip. And on the “shaper tip” I should be able to put the rocker table.
Almost all the pieces are cut, I have started the assembly and I will post some pictures of the finishing product. To have the different extension attached on the feet I will use big screws and bolts, this will help me to reduce the cluttering of the patio...
Please click on the ads that you will find within this blog it will help me to alleviate the spending, thank you.